Sunny Days Classroom Kit

Brighten up any classroom with our printable kits

Lotsa Dots Classroom Kit

Colorful Printable kits help to cheer up any classroom

Sunny Days Classroom Kit

Organizational printables help keep your classroom functional and easy to manage

Back to School is a HOOT!

Colorful owls help bring an organized theme to your classroom

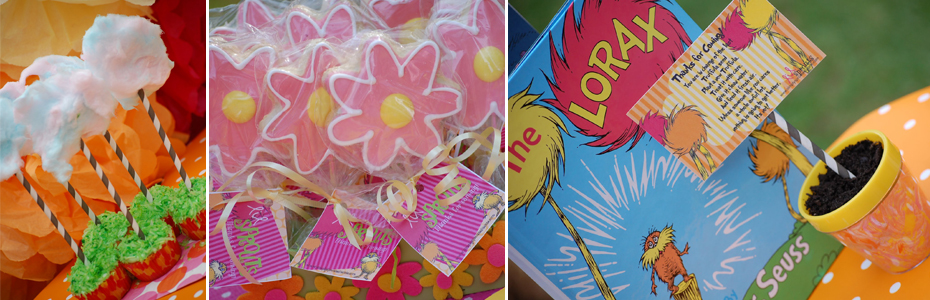
Lil Sprouts Educational Outreach: Lorax Party

Simply Sprout offers educational outreach to preschoolers using our classroom printable kits

Showing posts with label writing. Show all posts

Wednesday, August 8, 2012

Get right to the point with your writing center!


Does setting up a writing center give you writer's block?  Fear not, a writing center is an excellent place to show your creativity and style.  If you feel like you're lacking in those two areas these days, check out our writing center picks.  A space for young authors can be big or small, but make sure it's a place that's filled with supplies, ideas, and opportunities for students to build and strengthen their skills.  

a. Organize all of your writing supplies so they are at your student's fingertips. This wooden caddy keeps everything right where you need it to be. (Lakeshore Learning)
b. Colorful composition notebooks are a must for student expression. Allow your students some creative freedom by letting them chose their own pattern of journal. It's their space to write, let them have a say. (Wal-mart)
c. Colorful index cards. I love using these for sight words, they can be color coded for level (office depot) 
d. Thin markers are great for peer editing. Have your students trace capitals in green, punctuation in red. This helps to teach the start and stop of a sentence (Wal-mart)
e. Plastic spacemaker containers help keep your students supplies organized and separate. They store great on a shelf or in a cubby. (Wal-mart)
f. store sight words easily for practice in these colorful containers. (office depot)
g. Writing prompt journals are a helpful tool in teaching students to write on topic using specific vocabulary. Help improve their writing techniques and skills by using these every morning. (Lakeshore Learning)
h. Colorful post it notes are great to use when making comments on a students journal. I find it helps them to not feel like you are judging their writing. A post it is temporary and can be removed as the writing improves or is corrected, I also like using the colorful arrows to draw attention to awesome writing. Pointing out juicy adjective words, punctuation or impressive vocabulary, ( Big Lots)
i. Highlighters can help students recognize the parts of a word, or isolate certain letters or sounds. When I write with my students I like to focus on a specific skill. (Wal-mart) 
j. Dry erase boards are great for young writers, they can practice writing sight words, letter formation. They are also great for grammar games, and quick reviews. Of course you have to include some colorful dry erase markers. (Big Lots)

Keep your writing time fun and supportive. You want to encourage young writers so they will give you their best. I like using music in the background to help calm and inspire. I also love using thematic word walls to get those creative juices flowing.


a.  A bin of clipboards are great for a writing center.  They allow budding artist to join together in a comfortable space to read and peer edit. (Target)
b.  Put your students' writing portfolios in a special place that they can add to and share from throughout the year.  (Target)
c.  Highlighters and pens are a must when teaching children to locate topic sentences, juicy adjectives, and more.  (Office Depot)
d.  Who doesn't love Post-it notes?  Our class uses them while editing our peers to jot "3 praises" and "3 work-ons".  That way the author can keep up with the things they're doing well, and have at least three things to work on improving in their writing piece.  (Office Depot)
e.  Pick up inexpensive zipper pouches at those back to school sales.  Each student keeps one in their writing folder to store away interesting pictures, news articles, or ideas that they might have a chance to write about throughout the year.  (Target)
f.  Re-purpose aluminum cans with wrapping or scrapbook paper.  A stylish way to store pens, pencils, and highlighters in your writing center.
g.  This magnetic board is a great way to communicate ideas with your students at a center.  You could post writing tips, interesting prompt ideas, open ended questions, and learning goals for the activity. (Container Store)
h.  Journals make the list for the second time this week!  Journaling is an essential part of learning to be a good writer.  (Staples)


Saturday, June 2, 2012

Kick start your summer with a bucket list


The final school bell has rung, the backpacks are now thrown on your foyer floor and your kids have taken up permanent residence on your couch...They have only been out of school for a day and already it looks like a tornado has run through your living room. Kick start your summer by creating a bucket list with your family. Motivate your family to come up with some fun ways to pass those long summer days. A summer bucket list can really be anything you want it to be. From simple things like having a water balloon fight to a vacation destination. Your family sets the parameters. 

Encourage each family member no matter how young to think of at least 5 things they would like to do this summer. Print the tag below and write each idea on its own card. Place all of the cards in a bucket or small pail. When your kids are looking for something fun to do or accomplish have them pull out an activity card and get started.


My four year old and I sat down and came up with a few ideas of our own...here were her top 10!
 10. play in the sprinkler
9. wash the dog
8. have a picnic
7. make playdough
6. go camping
5. learn to ride my bike on the road
4. have a fashion show
3. do mommy's make-up
2. eat watermelon
1. catch fireflies (fairies)

 Our Summer Bucket of fun!


To make a bucket like the one pictured above. Purchase a  pail ( we found ours at Hobby Lobby) and tie lots of brightly colored ribbon onto the handle. This is a great fine motor skill for your little ones to practice, getting them ready to learn to tie their shoes. Fill the bucket up with your summer to do's and get ready to have some fun! Each time your kids are looking for something to do have them pull an activity card from the bucket. Or set a designated time each week to enjoy an activity from the bucket.

If you would like to take the traditional summer bucket list a step further visit our Teachers Pay Teachers store and download our summer bucket list pack. In it you will receive printable tags and lists to help you create your bucket list as well as journaling pages for your older children (first grade and above) You can print these pages and have them bound at your local copy store so your child will have a journal they can keep for all of their adventures over the summer. Encourage them to write about their experiences after completing each item on their list.


Classroom Freebies Manic Monday


Monday, August 15, 2011

Lesson 1 Color Sorting & Letter Recognition


Today was our very first activity we started off with a few basic skills
Color Sorting
Color Identification
Letter Recognition / Writing
Fine Motor Skills

Here are the supplies we used, you will also need a hot glue Gun and a Hair Dryer (Adult use only)

Step 1:  Begin by identifying the colors of the crayons, have your child pick three or four of their favorite colors. We chose 3. Kaitlyn chose orange, pink and green. She sorted them into three different containers.

Step 2:  (step 1) Glue a piece of cardstock onto the top of your canvas. (step 2 + 3) Glue the crayons onto the cardstock using the hot glue gun. (step 4) Once all colors are glued onto the cardstock place it upright in the direct hot sun. Place wax paper underneath to collect drippings. If you are not in a sunny location or the temperature is to chilly you can also achieve the same effect using a hair dryer on the high heat setting. Simply blowing the hair dryer on the crayons will help to melt the crayons and spread them down the canvas.


While we were waiting for the sun to work it's magic we read a book about how crayons are made. We learned about wax and how the different colors start off as a powder and are added to the wax to make crayons.

After our book, we put together some of our learning puzzles, we went grocery shopping, took a nap......and finally checked on our project. The crayons had just started to melt and drip down so we brought it inside to use the hairdryer to finish the rest.
Kaitlyn learned all about the effects heat has on an object, she can tell you that the sun is hot and heat melts wax crayons. ***Important beginning understanding of how the world works :) After we were finished and the wax dried ( about 10 min) I cut the crayons into smaller pieces with a pair of scissors.


Kaitlyn learned all about the letter K, we practiced writing it on paper, and used our learning puzzles to learn about the sound a K makes by comparing "K" pictures, and tracing the letter "K" with her finger. She then painted her wooden "K" brown and added some small pink polka dots ( found in the scrapbook section at Hobby Lobby)

Kaitlyn starts with a "K"!

Mommy Hot glued her letter "K" on and Kaitlyn added a few owl stickers to her art work....and viola a finished masterpiece.....Kaitlyn learned quite a bit by having fun and now she has a unique piece of art that she made from scratch, I think I know the perfect spot for it, right on her bedroom door.

Posted by Picasa