Sunny Days Classroom Kit

Brighten up any classroom with our printable kits

Lotsa Dots Classroom Kit

Colorful Printable kits help to cheer up any classroom

Sunny Days Classroom Kit

Organizational printables help keep your classroom functional and easy to manage

Back to School is a HOOT!

Colorful owls help bring an organized theme to your classroom

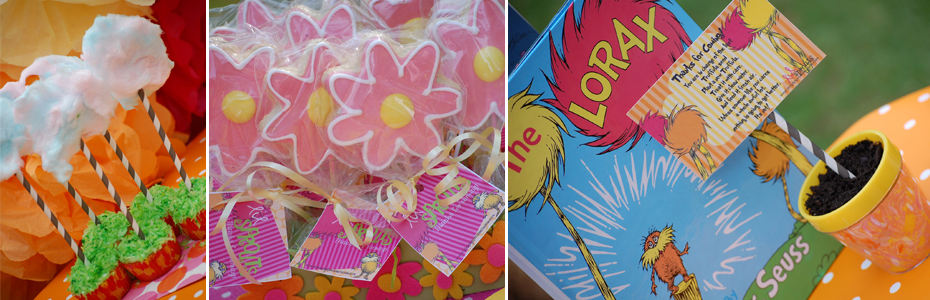
Lil Sprouts Educational Outreach: Lorax Party

Simply Sprout offers educational outreach to preschoolers using our classroom printable kits

Showing posts with label simply sprout. Show all posts

Friday, June 29, 2012

Homemade Puffy Paint


We have had a lot of rainy wet days here in Florida, you can usually set your watch by the afternoon thunderstorms. It is so easy to quickly run out of stuff to do with your little ones. The moment the sky starts to turn dark my children start to immediately lose interest in all of their store bought toys. No matter how many toy trucks, dress up clothes, puzzles, baby dolls or Tinkerbell fairies my children have its never enough to keep their attention when the storms roll in. I immediately see them running crazy through the house, forgetting all of our house rules and driving this mama crazy!


Time to get Creative!

Being a first grade teacher I have tackled my fair share of messy fun projects. Which I minded much less when I knew a janitor would be coming through to help me tidy up before the first bell rung the next morning. Doing messy projects at home can sometimes feel overwhelming...but they are so worth it! Messy play is a developmental must for little hands and minds. They need to be encouraged to explore their own curiosity with minimal guidelines (or rules) from you....after all it's only a mess, nothing a Clorox wipe can't clean up.
We decided to make our own puffy paint. We followed this simple recipe, comprised of things that were already in our pantry.

3 Tbs. Flour
2 Tbs. Corn Starch
2 Tbs. Water
1 Tsp. salt
Food coloring

You want the mixture to be like cake batter consistency. If it's too runny just add a little more flour and corn starch.

I used an over sized muffin tin to hold our puffy paint. Plastic squeeze containers work great too...I just didn't have any on hand and lord knows I didn't want to run to the store in the rain with two kids!  I had the kids use some baby q-tips to apply the puffy paint, even my 16 month old was able to create his own masterpiece using the puffy paint. Once they are done with their creation put it in the microwave for 10 - 15 seconds ( depending on your microwave you might need to do a little more or a little less...please watch it and don't walk away for safety)
When you take the paper out you will see it start to puff up immediately. Viola you have made your own art using homemade puffy paint!

We moved our painting party to the bathtub once we ran out of paper...the kids painted the tile walls and themselves with the paint...cleanup was pretty simple we just rinsed the shower/tub with hot water. The kids had a blast and before we knew it those afternoon thunderstorms rolled through and the sun was out again!


What homemade recipes have you tried with your little ones? We would love for you to share your favorites below.....leave us a comment!
Posted by Picasa

Monday, June 18, 2012

A Camping we will go!


 Being the mom of two little ones under the age of 4. I never really thought I would find myself camping anytime soon. Don't get me wrong, I grew up camping with my family and have very fond memories of it. However, now that I am a mom of two kids it just seems like a whole lot of work. But when I saw the cute little toys from Chick-fil-a advertising for the Great American Backyard Campout, I have to say I was intrigued. Could I really do this? Could we go camping as a family and actually survive? The more I thought about it the more determined I was to make it happen. I'm here to tell you if we can do it you can too!
I'm not talking anything crazy like camping in the Grand Canyon or anything...just the backyard. It's the perfect setting to get your camping groove on, you are outside in a tent having fun making memories with your little ones, yet your bathroom is just steps away. It's the best of both worlds.

Even though most of my friends thought I was crazy I decided to plan a backyard camping adventure for my family. It would be me my husband, my 4 year old daughter, my one year old son and our Beagle Bailey. Our goal was to have everything set up outside just like we would at a campground. Our first mission was to set up camp. With two little ones underfoot this is probably the most challenging part. So I set up a few activities to keep my four year old and my one year old busy. 

Bugs in a Jar

The first one was for her to find a few bugs to put in a jar so we could observe them. Kaitlyn hunted for different bugs that she was brave enough to scoop up. once she caught one she added some sticks and a leaf. This is a perfect activity to discuss habitats and animal needs with your little ones. ( after the tent is set up of course)


 Camping Activity Pack


The second activity was an activity pack I created you can purchase one from my Teachers Pay Teachers store, just print and laminate at your local office copy store. There are all sorts of independent activities inside for your little one to do. From simple math practice to a nature scavenger hunt. She also had a great time collecting leaves and counting them. The best part is you just wipe away the marker and she can do the activities again.


 Once the tent was all set up Kaitlyn and Callen were just dying to get inside, they couldn't wait to explore on the air mattress and play in the sleeping bags. Kaitlyn unpacked her books she brought and her flashlight and found a comfy spot on our bed to read to her brother.

 A few things I found to be helpful while on our backyard adventure...

Setting up

A large jug with lemonade sat on our table for our little ones to access when they were thirsty. We each had our own plastic cups with our name on them. This is a great way to keep the trash to a minimum. Its also a fun thing for the kids to do write their name and decorate their cup. If you want to get real creative bring some stickers for them to add to their cup.

 Playtime


 Letting the kids go for a swim right before dinner. This is great for a couple of reasons. The kids have fun splashing around and playing in the pool and it cools them down and keeps them from being too hot at night. There are a lot of great campgrounds that have natural springs, lakes or rivers. So when you decide to take your camping adventure on the road look for a campsite that is close to a body of water, especially in the summer.

 Dinner time

For dinner we kept it simple, we got the fire pit going. Earlier, we built a fire pit around an old stump in our backyard, we added two tiers of stacked stone from our local Home Depot for some added safety for our little ones.We stacked some wood to the sides to hold the grates from our grill. We opened a can of beans and put them in a cast iron pan. We added some hot dogs onto our hot dog cooking stick ( found that in the camping department at Wal-mart). Dinner was done in about 5 minutes...and it was yummy! getting the kids to help cook dinner took no effort at all. Kaitlyn couldn't wait to help roast the hot dogs!

After Dark


What to do when the sun goes down is the biggest question of all. We stocked up on some fun glow in the dark items from Target...so when the sun went down it was time for some glow in the dark fun!

 Glowing Fairy Dust


 Our first project was a glow in the dark glitter jar...we have seen them all over pinterest but I wasn't sure if they would really work. We got a few glo-stick wands and carefully cut them open and poured them into a mason jar that was already coated with some glitter. We put the lid on and Kaitlyn shook it up...it sparkled and glowed on the table and lasted well into the night. We told her it was magic fairy dust! I didn't get a good picture at night but you can see a few different samples on our pinterest boards.


 Midnight snack

You can't have a camp out without some old fashioned s'mores! We sat around the fire telling spooky stories (toddler appropriate of course).
I was amazed at my daughter's creativity. Telling stories is a great pre-reading skill and helps tremendously with writing skills as well as reading comprehension down the road.


Before Bedtime fun

Our last activity we did right before bed, we turned down the lanterns and put out the fire and got our glow in the dark bubbles ready. I carefully mixed together the solution and stirred together. We were amazed at the bubbles they actually glowed in the dark. They were faint at first but as our eyes adjusted to the dark they got brighter...before we knew it there were splats all over the grass, a little on our clothes and even some on poor Bailey.

It's Lights out....well maybe

Bedtime went a lot better than expected, we put our one year old to sleep in his pack in play before we did s'mores. He was out like a light within a few minutes. The lull of the crickets and night noises were better than any sound machine. When we finished our glow in the dark fun we headed into the tent for the night. My daughter slept in her sleeping bag and we slept on an air mattress. We had the fan going ( I guess I really could never do primitive camping...I do like my electricity) and we were even a bit cold at night which is hard to believe. After all we are in Florida in the middle of the summer. I laid there in bed snuggled up in my blankets next to my daughter who was sound asleep in her sleeping bag, I listened to my son's rhythmic breathing in his pack n play. I listened to the crickets and the night noises. All in all our adventure had been a great success. We camped out, we cooked our own dinner via fire, we entertained ourselves and we put two kids to bed outside..we did it! I fell asleep with a sense of bliss at all we had done...and I woke up shortly after with a sore back. It felt like I was laying on bricks. My kids are still asleep, and I can't move without feeling sore. I turn to try to get a little more comfortable but nothing helps, I am physically on the floor their is no air left in my "air" mattress. All of my noise wakes the baby who I quickly try to stop from crying so he doesn't wake up the entire neighborhood. He goes from crying to hysterically giggling and crawling all over our deflated air mattress. I take a moment to assess the situation...it's 5 in the morning, My husband and I are literally on the ground, the baby is awake and I know the sun is going to be rising sooner than I would like. So I did what any rational mom would do. I woke up my snoring husband and we carried those babies into the house, one still asleep and one still giggling and carrying on.  I put them in their beds and pulled down their room darkening shades. I crawled into my comfy bed and snoozed off to dreamland...after all that is the single most beneficial thing to camping in your backyard... if things go wrong, your bed is just steps away. My kids slept in till a little past nine and when they woke up we went back outside to finish our adventure. We made our own campfire breakfast, swam in the pool and enjoyed one very gorgeous Father's Day.

Breakfast

We had a lot of fun making breakfast in the morning. We used the fire pit and our iron skillet to cook up some bacon and even some pancakes. We used the shake and pour kind. Just add water and pour onto the hot pan. They were literally the best pancakes I think I have ever had! We served some fruit with it.

It was so nice to sit outside among the cool morning breeze, unplugged from the TV, phone and computer just enjoying the moment. My daughter says to us, " Mommy I want to camp for 5 days, I love camping this is the best time ever!". So that about sums it up it was a great success! Even though we didn't technically spend the entire night in the tent, we made a lot of memories together and had a whole lot of fun. There is always next time!

I hope you and your family are inspired to take part in the Great American Backyard Campout Saturday, June 23rd. It's a great way to get your kids to connect with nature, have a great time making memories with family and learn a thing or two. We would love to see pictures of you and your family camping, please send us some at simplysprout@gmail.com and we will feature them on our website.
If you are in the Tallahassee area and would like to join us for our Lil Sprouts Camping Activity day please RSVP on facebook It will be held June 23rd from 4:30 - 6.

Saturday, June 2, 2012

Kick start your summer with a bucket list


The final school bell has rung, the backpacks are now thrown on your foyer floor and your kids have taken up permanent residence on your couch...They have only been out of school for a day and already it looks like a tornado has run through your living room. Kick start your summer by creating a bucket list with your family. Motivate your family to come up with some fun ways to pass those long summer days. A summer bucket list can really be anything you want it to be. From simple things like having a water balloon fight to a vacation destination. Your family sets the parameters. 

Encourage each family member no matter how young to think of at least 5 things they would like to do this summer. Print the tag below and write each idea on its own card. Place all of the cards in a bucket or small pail. When your kids are looking for something fun to do or accomplish have them pull out an activity card and get started.


My four year old and I sat down and came up with a few ideas of our own...here were her top 10!
 10. play in the sprinkler
9. wash the dog
8. have a picnic
7. make playdough
6. go camping
5. learn to ride my bike on the road
4. have a fashion show
3. do mommy's make-up
2. eat watermelon
1. catch fireflies (fairies)

 Our Summer Bucket of fun!


To make a bucket like the one pictured above. Purchase a  pail ( we found ours at Hobby Lobby) and tie lots of brightly colored ribbon onto the handle. This is a great fine motor skill for your little ones to practice, getting them ready to learn to tie their shoes. Fill the bucket up with your summer to do's and get ready to have some fun! Each time your kids are looking for something to do have them pull an activity card from the bucket. Or set a designated time each week to enjoy an activity from the bucket.

If you would like to take the traditional summer bucket list a step further visit our Teachers Pay Teachers store and download our summer bucket list pack. In it you will receive printable tags and lists to help you create your bucket list as well as journaling pages for your older children (first grade and above) You can print these pages and have them bound at your local copy store so your child will have a journal they can keep for all of their adventures over the summer. Encourage them to write about their experiences after completing each item on their list.


Classroom Freebies Manic Monday


Wednesday, May 30, 2012

Create your own backyard bliss just in time for summer


Dust off your grills and break out the pool toys summer is right around the corner. Pretty soon your kids will be camped out on the couch remote in hand complaining that there is nothing to do. So do yourself a favor take a weekend and get your backyard ready for summer. There are some inexpensive things you can add to your backyard, no matter what the size that are sure to keep your kids engaged and having fun. Here are a few of my favorite backyard DIY's that you can easily do in a weekend and keep those kids busy and learning all summer long.


Project1: Building a Raceway

Use brick pavers to create a road for your little ones favorite trucks and cars, add buildings out of blocks of wood and tunnels using some PVC pipe and a little mulch. Your little ones will let their imaginations loose and play for hours.

Project 2: An Outdoor chalkboard

This is a must have for any backyard, simply mount a large piece of plywood onto your fence, (We used a scrap piece from a recent home improvement project) and paint with black chalkboard paint. If you are impatient like I am you can use the spraypaint. It dries very quickly and goes on very easy. Make sure it is mounted so your little ones can reach, use a small towel hook to hang a galvanized bucket for your chalk. Let your little ones explore with their chalk, let their inner artist go! Crayola makes a wide variety of sidewalk paint including 3D paint, so be on the look out for some fun new products you can let your little ones try out on their chalkboards.


Project 3: A Water Table

Lets face it on those hot summer days your little ones want to splash around, but you need something that won't attract the bugs and is easy to cleanup. I love this project at Lowes you take an inexpensive drip pan and use it as a makeshift water table, easy to just flip over when not in use to keep those pesky mosquitoes away. Your little ones will love splashing around and playing with their water toys.


Project 4: A Plexi Art easel

This is our last project we are adding to our backyard summer reno, Home depot sells sheets of plexi glass, a hard piece of lucite that you can attach to your fence. We used some scrap wood to create a small easel edge on our fence. We are also adding metal binder clips which we hot glue to the plexiglass, to hold up artwork and paper for our little ones to get creative. We are adding the plexiglass above it for a couple of reasons. When painting you can simply hose the plexiglass down for easy clean up (we really didn't want a rainbow colored fence). You can also encourage your little ones to explore with a multitude of materials like shaving cream, gels, paint etc.

My number one mom tip is to make sure you include a relaxing shady place for mom to hang out so you can supervise those young ones. For me it's a hammock nestled right between two trees. I'm right in the middle of all the creative action!


Some other summer must haves for your backyard bliss....


Bubble, bubbles and more bubbles. 

Kids love to explore with bubbles. So why not encourage their fun. You can purchase an inexpensive kiddie pool ( that could double as a water sensory bin for your little ones) and a hula hoop. Fill your pool with bubbles ( dawn liquid dish soap and water works best, you can add a few drops of glycerin if you would like stronger bubbles) Have your child stand in the pool and pull the hula hoop over their head and Viola! They are in a bubble! They can also use the hoop to twirl around and make their own large bubbles. I love keeping a large drink canister (plastic of course) on our deck with bubble solution in it. I give my daughter a plastic cup for her bubbles and she refills them when she runs out...she is 4 so they run our quite a bit!


Waterballoons

Enough can't be said for a good old fashioned water balloon fight. Waterballoons are squishy and slippery and down right fun to pick up. Keeping these on hand for an afternoon splash fight will be sure to bring a giggle to your little ones face. Encourage them to sort them by colors into a variety of buckets, or count them. Or one of my favorite literacy games is to tape flash cards ( letters) to a wall or fence and call out the different letters have your little one hit the correct letter with their water balloon....just remember the younger your child the larger the letters need to be. For your older kids do this with math problems or other concepts that need some practice.


So get those kids off the couch and playing outside instead. Have them help you create a backyard oasis that they can enjoy with their friends all summer long. 
Join us on Pinterest to see some more creative backyard ideas!


Monday, May 28, 2012

Mommy & Me Mondays: A heartfelt Thank You


Happy Memorial Day!  Boy am I proud to be an American.  Days like today make me stop and realize that we remember many, but we honor all who serve and served our country.  Both of my grandpas are veterans, and I couldn't let this day go by without a thank you.  Throughout the years I have have found it very important to teach my students about civic responsibility.  We've had pen pals in Iraq, made hundreds of baggies of candy to be dropped on low flying missions over Afghanistan, written to Wounded Warriors, and reached out to our local armory.  Our school hosts Take a Veteran to School Day each November, and this event allows students to honor and hear about sacrifice first hand.  Memorial Day is more than just yummy backyard barbeques, it is also a day of remembrance and gratitude.

For our Mommy and Me Monday activity this week Mack and I decided to make a thank you note.  I think I might be one of the last people on Earth that still LOVES snail mail, so this was a perfect project for me.  Teaching children the significance of thanking others is important.  Whether it be for material things, kind gestures, or freedom.  We started off our thank you by heading to the pantry and grabbing a potato.  I hadn't made a potato stamp in a very long time, much less a star shaped one, so this was going to be interesting.  I prevailed and we got to painting. 
 I'm working with Mack on color recognition.  He is tempted to classify everything as green, so with some badgering he got the red and blue pattern down.  Let me back up a little though.  I let him use the potato stamp freely at first, since a 20 month old isn't really concerned about a "neat" product (but I doubt my grandpa is either).  Once he got used to holding the stamp, we started with our border pattern.  I wrote a sweet thank you message to my grandpa (Mack's great-grandpa), he signed, and we sealed with love and admiration. 

Today would be a great day to have your children design their own thank you notes.  Your children could mail them to a family member or friend who is a military hero or someone in your community that has lost a hero.  A thank you goes a long way when it's made with love from a child.


Posted by Picasa

Sunday, May 27, 2012

Make snack time learning time with a patriotic snack


  We decided to pack our kids up today and take a little adventure. We went to a local blueberry farm near the Wacissa River. There were so many blueberries! Our kids each got a gallon bucket and were encouraged to fill it up, neither one of their buckets ever had more than a few berries at a time because they spent their time eating them...once my 1 year old discovered he could just walk right up to a bush sit down and eat, it was all over. 
I think in order to get their money from us they should have weighed my son when he arrived and then again when he left.


This was such a neat experience for my four year old to see where our food comes from, the owner of the property talked to her about how they cared for the bushes and even showed her how they take little "suckers" from the plant to make new ones. She saw blackberries and blueberries growing straight from the Earth.
 
 We took those berries home and since we have a whole gallon of them we brainstormed some ways to use all those blueberries, Kaitlyn loves them in oatmeal and on cereal, her daddy is looking forward to a fresh blueberry pie and I can't wait to make some of Amanda's homemade lemon blueberry bread.
But before all that we decided to turn snack time into math time.

To get in the spirit of Memorial Day we decided to go patriotic with our snack. I used my star shape cookie cutter to cut some star watermelon while Kaitlyn rinsed and cleaned the blueberries. She played around making different patterns focusing on A-B-A-B patterns as well as A-BB-A-BB patterns. She was learning and exploring all at the same time, making snack time learning time!

Blueberry Springs

383 Wacissa Springs Road, Wacissa, FL 32361.
Phone: 850-997-1238.
Open: Now Open, May 12, 2012, Tuesday through Sunday, from 7 am to 12 pm and 5 pm to 8 pm; Closed Mondays; We will be open through mid July, 2012
Bring Cash! 1 gallon of berries is $12

Do yourself a favor and pack a picnic lunch, go blueberry picking and then go dip your toes in the Wacissa River.