Sunny Days Classroom Kit

Brighten up any classroom with our printable kits

Lotsa Dots Classroom Kit

Colorful Printable kits help to cheer up any classroom

Sunny Days Classroom Kit

Organizational printables help keep your classroom functional and easy to manage

Back to School is a HOOT!

Colorful owls help bring an organized theme to your classroom

Lil Sprouts Educational Outreach: Lorax Party

Simply Sprout offers educational outreach to preschoolers using our classroom printable kits

Wednesday, July 18, 2012

Lil Sprouts Book Club: G is for Gold Medal

We're kicking off our celebration of Olympic fun with a Lil Sprouts Book Club choice, G is for Gold Medal.  It's important to give children some background information before major events like the Olympics or even your Backyard Olympics!  Just like all of the books in the alphabet series, Brad Herzog and Doug Bowles do an amazing job with the informative writing and illustrations. 

The Olympics are a big deal!  We don't wait around years for much these days, so take this opportunity to make it a fun learning experience at your house.  Invite some friends or family over for your Backyard Olympics and have Opening Ceremonies.  Encourage your kids and their guests to pick a country to represent.  Have them come to your house wearing something that represents that country, and to bring an authentic dish from that country to share.  This will introduce your child to a variety of new and interesting foods, and get your athletes full and ready to compete.  Our school has Olympic Days each year and the teachers and students are so creative in their costumes.  It definitely adds fun and spirit to the event!


Start your Olympic games off with your children making torches.  The tradition of the Olympic flame and torch are as old as the Olympics.  For each Olympics a new flame is started in Greece and then paraded around until it makes it to the host city.  For this kid friendly torch all you'll need is tissue paper and tin foil.  I had my niece stack three sheets of tissue paper (red, orange, and yellow) on top of one another.  Then she folded it in half (horizontally), and twisted the bottom portion of the paper together.  I tore a piece of tin foil for her, and we wrapped in around the twisted tissue paper.


Now it was time to make a wreath of olive branches.  Historically the wreath of branches was placed on the winner's head.  I explained to my five year old niece that she would have to wait until the games were over to wear the "headband" as she called it.  I winked and told her that I had a good feeling that she was going to be a winner!  I made a leaf stencil out of a file folder and gave her some green paper, a pencil, and some scissors.  She did a great job tracing, and thought it was the coolest thing to fold the paper in half to get two leaves for one!  We worked on the skills of holding her scissors correctly and cutting.  I love how her leaves turned out, compared to the "perfect" leaves I would have made for her. She then glued them on to a long narrow piece of paper to make a wreath for her head. 


 To get ready for the start of our games we did a little photo shoot wearing togas.  Truth be told, the first Olympians competed nude.  I didn't even broach that subject with a five year old!  We read about the Olympic motto and oath and talked about the importance of good sportsmanship.  We were ready to start our games!  We'll see you back here for day two of Backyard Olympics where we'll featuring our first "sports"!

Here are some extension activities for different age groups:

Preschool/Early Elementary: The activities that this little Olympian did are great for any preschool or early elementary student.  You could also have them trace the words Swifter, Higher, Stronger (the Olympic motto) and have them draw the Olympic flag with its five interlocking rings using round lids.

Middle/Late Elementary: Children in this age range can design a costume and prepare an authentic dish for the Opening Ceremonies, research the history of the ancient or modern games, and/or design the route for the Olympic flame.  Give them a map of England and let them highlight a route that ends up in London.


Tuesday, July 17, 2012

Olympic Fun For Kids


We're running, jumping, and stroking with excitement to start the 2012 Olympics in just over a week!  The Olympics are a great opportunity to teach children about not only a variety of sports, but also sportsmanship, diversity, and spirit!  Over the next couple of days I will share with you some really simple ways to get into the Olympic spirit with your kids. 

These activities are great for the youngest of Olympians all the way to older Olympians (I start my fifth grade year off every four years with this unit, and the kids love it!).  Each day I will give you an extension activity for little ones and big ones.  But before all the fun begins gather a couple of things around the house so that you're ready for Simply Sprout's Opening Ceremonies tomorrow!


What you'll need for your backyard Olympics:

* Straws
* Kid friendly scissors
* Red, yellow, and orange tissue paper
* Pencil
* Tape
* Cotton balls
* Tin foil
* Paper plates
* Circular plastic top to a food container
* Washable paint
* Piece of ribbon
* Party hats or cups
* Green construction paper
* Glue stick

Don't be nervous.  It looks like a lot of stuff to gather, but I'm pretty sure most of it is in your house somewhere!  Also, you can adapt these however you would like.  Make it fun and easy for your family! 


Sunday, July 15, 2012

Mommy & Me Mondays: Tactile letters


 We are in full swing here getting ready for Pre-K to start this Fall. We have been practicing our letters and flash cards a little here and there trying to prepare Kaitlyn for back to school. Kaitlyn like most 4 year olds struggles with her letter recognition especially when using flash cards. Which as a first grade teacher I am here to tell you is totally normal and will not be an indicator for how quickly your child learns to read. Just like all children walk at different times, cut their teeth at different times and learn to talk at different times they will learn to read when they are ready. But there are some things you can do to help them prepare without getting them burned out or stressed.

One of my favorite ways to review letters is by using pipe cleaners. I let Kaitlyn pick these out at our local craft store, she just loved the sparkles. I cut them into thirds and a few pieces even smaller than that. I pulled out our flashcards and separated the letters that were found in her name. When working with letter memorization its best to focus on small chunk of letters rather than all of them at once. I helped her with the name of each letter and we put them in order to spell her name. I then gave her the pieces of the pipe cleaners and had her make the letters. I had to show her how to twist the pipe cleaners at first but once she got the hang of it she was able to make them on her own.

 
After she made all of her letters and aligned them onto the flashcards. I had her trace each letter with her finger. Making connections using the sense of touch helps little ones to retain verbal information. By repeating the sound or name of the letter while tracing it with their finger helps them to link their tactile (touching) experience with the auditory naming of the letter. Connecting these two senses helps little ones to retain what is taught.

 
After we worked on naming the letters I mixed them all up and placed them into a pile. I had Kaitlyn put them in order, spelling out her name. This is a great way to get them ready to write and spell their own name.
This is a great way to provide a tactile experience and help little ones to learn their letters. Each night introduce 3 or 4 more letters until you have introduced the entire alphabet. Keep them in a ziploc bag for them to pull out for some quick letter practice. These are great to keep in your purse or in the car for a little learning time while doing errands. it will keep their little hands and minds busy. Just have them pull out a letter and try to name it. For older kids have them tell you something that starts with the letter they pulled out.


Take a few minutes out of your Monday to spend some one on one time with your little ones. Choose a skill that they need some practice with and work with them. As we gear up for getting ready to go back to school  we will start featuring a few more ways you can get your child ready for the classroom.


Posted by Picasa

Thursday, July 12, 2012

Getting Creative with Watercolors


Today we are being featured at one of our favorite places 
You can check out one of our favorite art projects for our little friends. The end product is amazing and one of a kind! Perfect to adorn any wall in in your home.

Watercolors are a classroom favorite for us. They allow children to be expressive and let their inner artist shine. At Simply Sprout we love to encourage kids to roll up their sleeves and get a little messy. So what better way to spend a rainy afternoon than by creating a little art for your walls using watercolors. We promise even the littlest hands can help you create something frame worthy for your home.

Start off by gathering some materials:
Scrapbook stickers in various styles
White construction paper
Craft paint / brushes/ small containers to hold paint
stickers

To get ready, use shallow containers and add a little craft paint*, dilute with water.
*Using craft paint helps to give you more vibrant colors.
Have your little one help you come up with a phrase or saying (depending on the age you might need to help with this). Have them help you identify the letters and stick them into the correct order on their construction paper. Once your layout is complete encourage your child to paint their paper using the watercolors (diluted paint). Allow to dry. Peel off the stickers to reveal their masterpiece.


Prehistoric Play: Ice Age Discovery


Right now its hard to find a way to beat the summer heat. After all it is Florida and it has been oppressively HOT!!!! So why not create your own little Ice Age. This is a cute and simple science activity you can do with your little ones at home to help them understand how animals can be preserved in Ice and how scientist can find them many years later and study them. To learn a little more about the last Ice Age and the animals that were there click here.

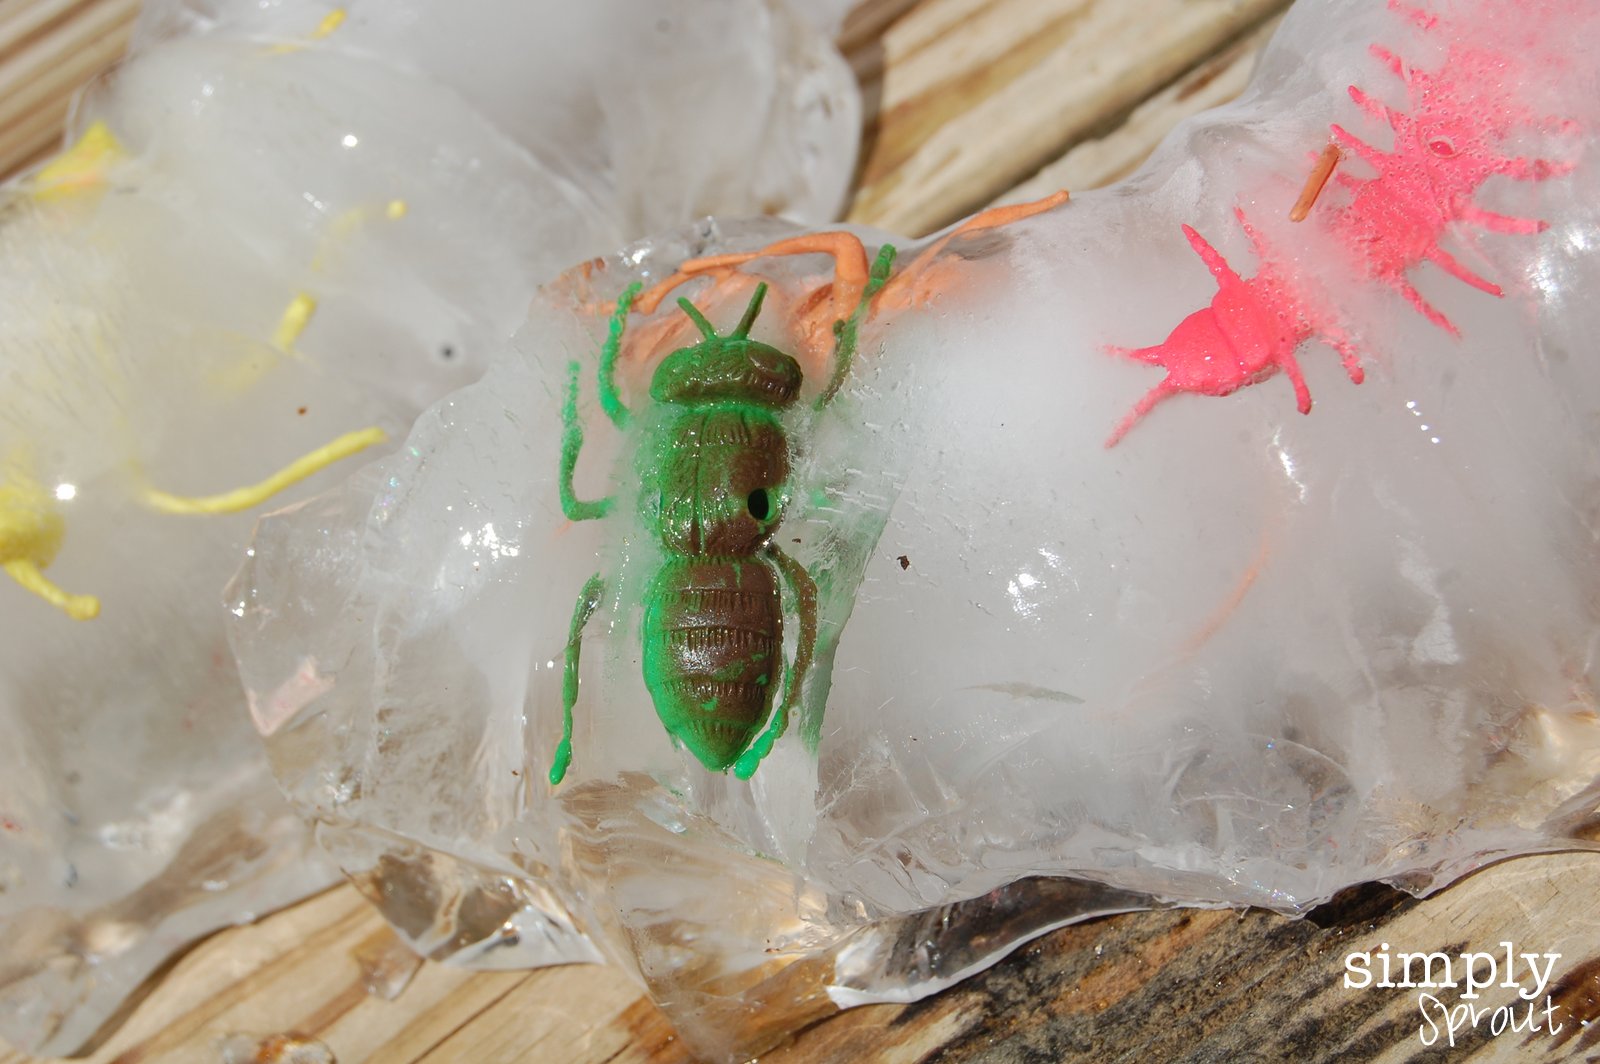
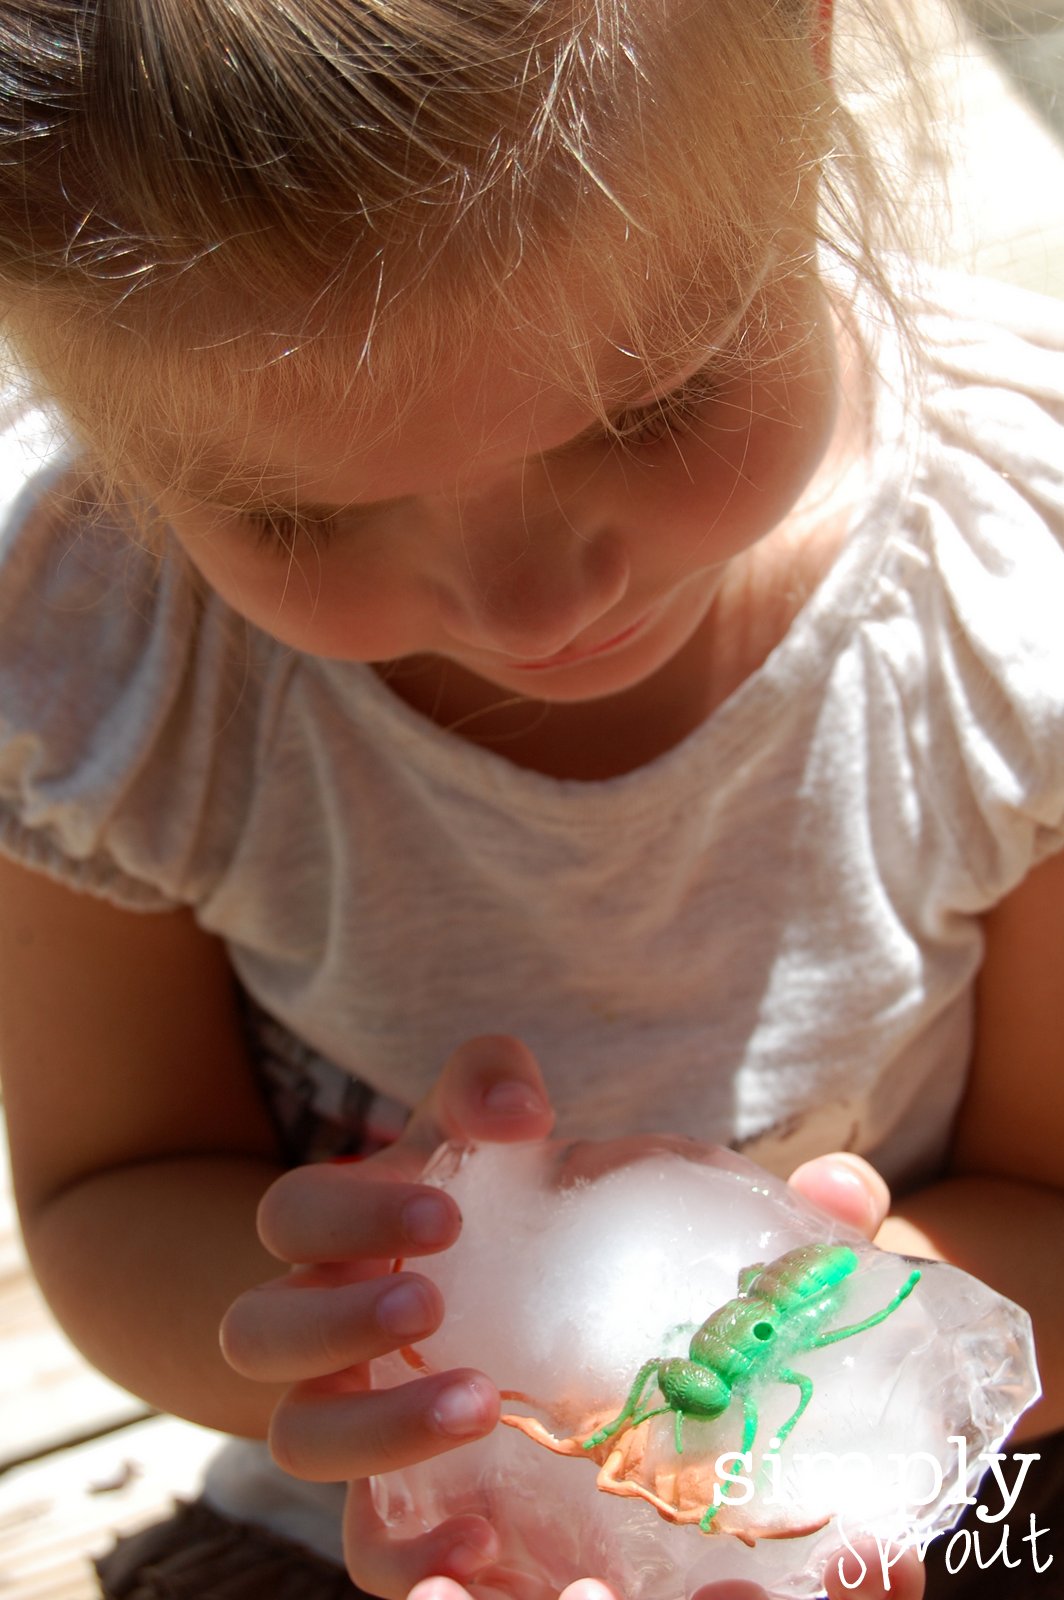
All you need to do to prepare is find a large bowl or bundt cake pan. Fill it with water and add some plastic critters. They can be bugs, dinosaurs, ocean animals whatever you happen to have lying around.

Freeze overnight. The next day run a little warm water around the edge of the pan to loosen your glacier sample.

Have your little scientist head outside with a rubber hammer, or other plastic tools like a fork or spoon. Have them try to free the animals from their glacier. When they are done setting them free you can talk about how the animals might have found their way into the ice. They can also investigate their animals and compare them. How many legs do they have? Are they insects, mammals or reptiles?


Another great science concept to introduce is the effects of the sun (heat) on their glacier (ice). You can talk to them about how the sun's heat warms the Earth and melts our glaciers filling our oceans with more water. Depending on how old your children are you might even talk to them about ways our climate has changed over the past, and how the polar caps and glaciers are melting more rapidly within the last 100 years.
Beginning with basic science activities helps lay a foundation for your child as they enter the classroom and are exposed to a variety of science concepts. It is never too early to start talking science with your little ones!


Posted by Picasa

Wednesday, July 11, 2012

Lil Sprouts Book Club: I Love You Stinky Face


Doesn't he just look like a swamp creature with slimy, smelly seaweed hanging from his body?  If you're like me you've memorized those lines from the imaginative little tale of I Love You, Stinky Face by Lisa McCourt.  If you aren't familiar with this sweet and humorous children's book, I suggest you get yourself a copy real soon!  We've been reading it at bed time since Mack was a wee little stinky face and now we know it by heart.  If the title doesn't exactly catch your attention, the story of a curious little boy will.  He does a fabulous job of procrastinating bedtime by asking his "Mama" a bunch of creative questions.


The little boy asks of his mama, "But, Mama, but, Mama, what if I were a super smelly skunk, and I smelled so bad that my name was Stinky Face?  


As she lovingly replies, "Then I'd plunk you in a bubble bath!  But if you still smelled stinky, I wouldn't mind.  I'd whisper in your ear, 'I love you, stinky face.'"

The wonderful illustrations by Cyd Moore allow any reader young and old to day dream about life as a scary monster or dinosaur.  With summertime in full swing at our house, lunch time routines can get a little boring.  The older our son gets the more food choices he would like to make.  It's my job to make sure that a balanced meal is going down the hatch!  A fun way to extend reading is to make a meal or dessert based around the story.  I based this lunch around the imaginary creatures in I Love You, Stinky Face, and had fun doing it.
 
I don't want to give away the whole story, but just a little hint...there's a hamburger lovin' dinosaur (bones out of string cheese and a hamburger patty), an alien that prefers bugs over peanut butter (mini rice cakes with peanut butter and raisins as bugs), an ape (a stack of bananas), and a sea creature (green dyed whole grain pasta for seaweed). While I was putting together the lunchtime treat, Mack had some tactile fun playing with the leftover spaghetti.  It was in his hair, on the walls, and on the floor, but an easy cleanup!

This story is silly, but so true.  You could cover our little ones in slimy seaweed or have them act like an alien from Mars, and we would still love them the same each and every day.  Mama loves you little stinky face!


Monday, July 9, 2012

It's an Ice Age Dino Dig

My daughter is the perfect age right now for going to the movies. She loves the experience of going to the theaters and getting her snack and watching a  movie on the big screen. But amidst the popcorn and Reeses Pieces come the endless questions....Mommy why does that elephant have hair? Mommy why does that squirrel have teeth? Mommy why is there so much ice?  The questions go on and on for what feels like an Ice Age.  So this time as the 4th movie is about to be released, I want to be prepared. I decided to do a little prehistorical play before we go and see the movie when it debuts this weekend.

The Ice Age series is one of my favorites. There is a lot of humor and  a lot of scientific references, the teacher in me loves that. I love when concepts are introduced to kids that encourage them to investigate a little further. Ice age is the perfect movie to introduce animals from the past, as well as the concept of Pangea, continents and the concept of changing over time. These concepts are very hard for a preschooler to comprehend without a little introduction. 

So in preparation for our trip to the movies we started off by talking a little bit about dinosaurs. We read a few books and talked about the pictures we saw. We talked about why scientist think dinosaurs are no longer around, and we talked about the proof that exist (dinosaur bones) that lets us know that they were here roaming the Earth where we now have cities and towns.The concept of things changing over time is very hard for young children to understand. It is hard for them to understand the aging process and how things have evolved over time whether it be cities or animals. So helping them using books or pictures helps them to establish some framework for understanding.


After reading our books I decided to set up our own archaeologist dig. I buried some shells and some dinosaur bones in the sand and gave my daughter a small paintbrush. She carefully used it to brush away the sand to eventually reveal the dinosaur.


Once the Dinosaur was unearthed we talked about what dinosaurs must have looked like and how they resemble some animals that still live today.


I then started talking with her about fossils and how fossils are made. We talked about how scientist use fossils to help them understand animals that are no longer living. Like the ones featured in Ice Age.

Fossils is a great book that helps to illustrate how fossils are obtained and preserved in our Earth for so many years. It also takes a closer look at the scientists that study fossils.
Join us later this week as we make our own fossils and do a little Ice Age discovery of our own.


Before you hit the theaters this weekend do a little prehistoric play with your preschoolers so they will understand the movie a little better. Use it as a teaching tool for making some great science connections and get those little minds thinking!

Posted by Picasa