Sunny Days Classroom Kit

Brighten up any classroom with our printable kits

Lotsa Dots Classroom Kit

Colorful Printable kits help to cheer up any classroom

Sunny Days Classroom Kit

Organizational printables help keep your classroom functional and easy to manage

Back to School is a HOOT!

Colorful owls help bring an organized theme to your classroom

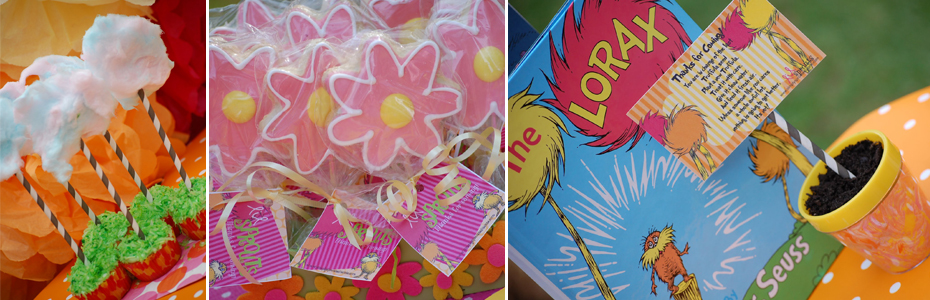
Lil Sprouts Educational Outreach: Lorax Party

Simply Sprout offers educational outreach to preschoolers using our classroom printable kits

Sunday, December 4, 2011

No Talent Needed - Advent Calendar

With little to no talent, and a busy Christmas season, you too can make this easy Advent Calendar.


I hope that easy and fun crafts like this allow you to slow down and enjoy the most wonderful season of all!

Saturday, November 26, 2011

A Woodlands Themed Mantle

This is our first Christmas season in our home, and I couldn't wait to decorate a mantle for the

Sunday, November 20, 2011

Camp Will


I along with the other guests not only survived our camping experience last night, we relished in it! Jen and Jason out did themselves yet again. Their backyard was transformed into a kid friendly campsite full of tents, hot dogs, and of course s'mores! Thanks for a delightful evening and that precious baby boy of yours. So can I cross camping off of my bucket list?

Thursday, November 17, 2011

Easy Holiday iron on transfers


It's as easy as 1- 2- 3!

Just go to www.marcylauren.etsy.com to purchase your design

Open Microsoft word or another word processing program, insert the image and then drag the corners to resize to the desired height.
and print onto Avery dark t-shirt transfer paper sold at Walmart.

Step 1: Cut the design out

Step 2: Peel the back off

Step 3: Position the transfer onto the shirt making sure it is straight

Step 4 and 5: Cover with the tissue paper provided, and then iron on no steam pressing firmly for 3 minutes or so moving the iron around to cover the entire image.

Step 6: Allow the shirt to cool and then peel off tissue paper......and you are done!!!!
Posted by Picasa

Sunday, November 6, 2011

Give Thanks Banner

A simple way to show your gratitude.

Start with a roll of packing paper or a brown paper grocery bag.


Cut rectangles, squares, triangles...really any shape you would like. I crumbled my rectangles to add a little texture to the banner. I also didn't cut out identical rectangles, but if you are a closet perfectionist, go right ahead!


Now start gluing on your letters. You could cut your letters out of fall inspired scrapbook paper, or use pre-cut letters. I happened to have multiple alphabets of letters due to a scrapbook store going out of business sale years ago. They have been collecting dust in a closet, and they were the inspiration for making a banner.


If you crumble your brown paper, you will find that the letters don't want to be glued down. So use a weight on each rectangle for a couple of minutes.


I've learned that it is virtually impossible to take nice pictures in our dining room, but here is the idea. The banner is MUCH cuter in person (if I do say so myself). Oh and those curtains were less than $14 a panel at Wal-mart. Yes, I have been to Wal-mart for all you naysayers!

Monday, October 31, 2011

Halloween fun

Ghost Candles
This morning started off with some spooky pancakes and some Halloween fun! Kaitlyn and I made some Ghost candles out of old spaghetti jars. She squeezed some white paint into them and I added a few tablespoons of water...she shook them both up to coat the jar. I drew the eyes and mouth and she used the sharpie to color it in. Put a small flameless candle in the bottom of the jar for a spooky effect...these looked so cute tonight in the kitchen window.

Halloween Counting Book
We worked on our counting skills today. Kaitlyn used some Halloween stickers to make a counting book. She sorted the shapes first and put them into piles. I drew the numbers on the pages and she added the correct number of shapes to the pages. We are working on recognizing her numbers and using tangible items to count and match to those numbers. When she was done she had a cute book to read tonight.

Candy Corn Counting
Next we practiced a few more numbers by using some candy corn. I made small little flash cards with the numbers 5, 6, 7 and 8 on them using scrapbook paper. I put some muffin wrappers with each card. K had to put the correct number of candy corn into each muffin wrapper. We talked about the numbers counted them and compared them. At the end she decided she wanted to eat the muffin wrapper that had 8 candy corn because it had the most.....I think she got the lesson :)

After Math we practiced her letters by playing a letter matching game, you can purchase it from my Teachers Pay Teachers Site here 


Painting
K had fun breaking out the paint and painting her candy corn...she had a little piece of candy as her inspiration :)

Posted by PicasaLunch was fun we made ghost sandwiches using our Halloween cookie cutters! Overall it was a spooktacular day, can't wait to see her go trick or treating tonight!

Mad Hatter's Tea Party


We threw the kids a Mad hatter's Tea Party this weekend, and it was oh so fun! My little 3 year old was Alice and her 7 month old brother was the Mad Hatter. All of their little friends came over in their costumes and drank colored "tea" (Crayola Flavored water, no sugar added, comes in bright colors and is sold at Walmart) and ate cookies. The Party Invitations and Printables can be found here For treats each guest got a spooky S'more kit ( graham crackers, mini hershey bar and a PEEP Ghost) They were so yummy on the fire!


Posted by Picasa